Monday 30 July 2007

Talam Ketan Pink

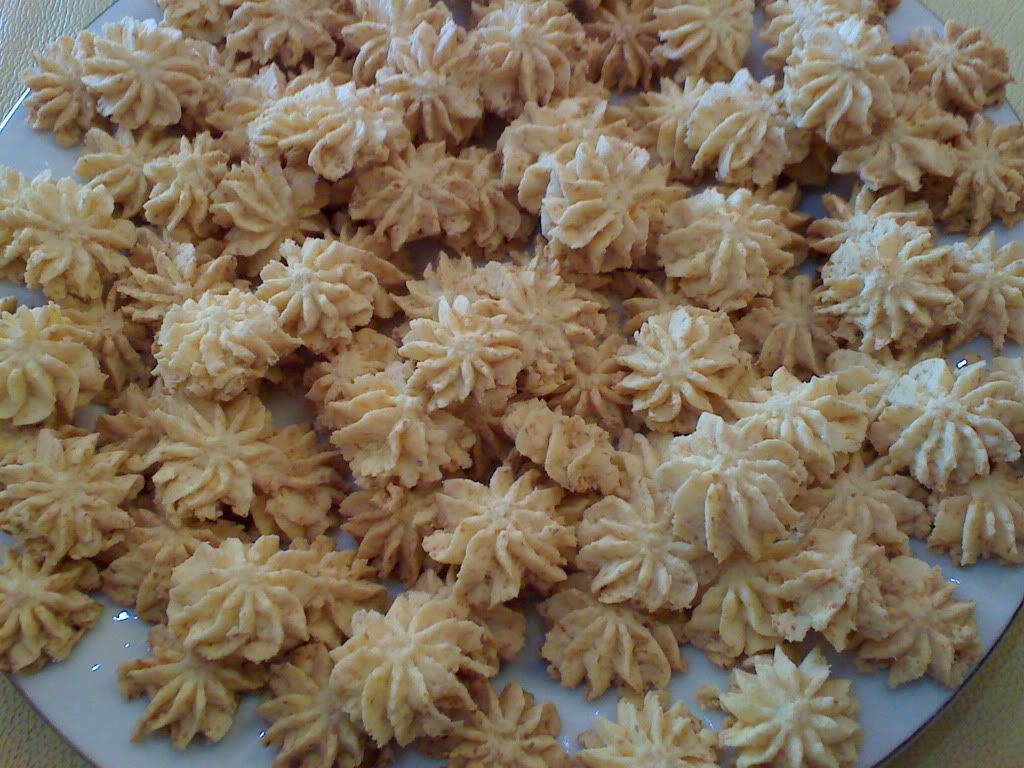
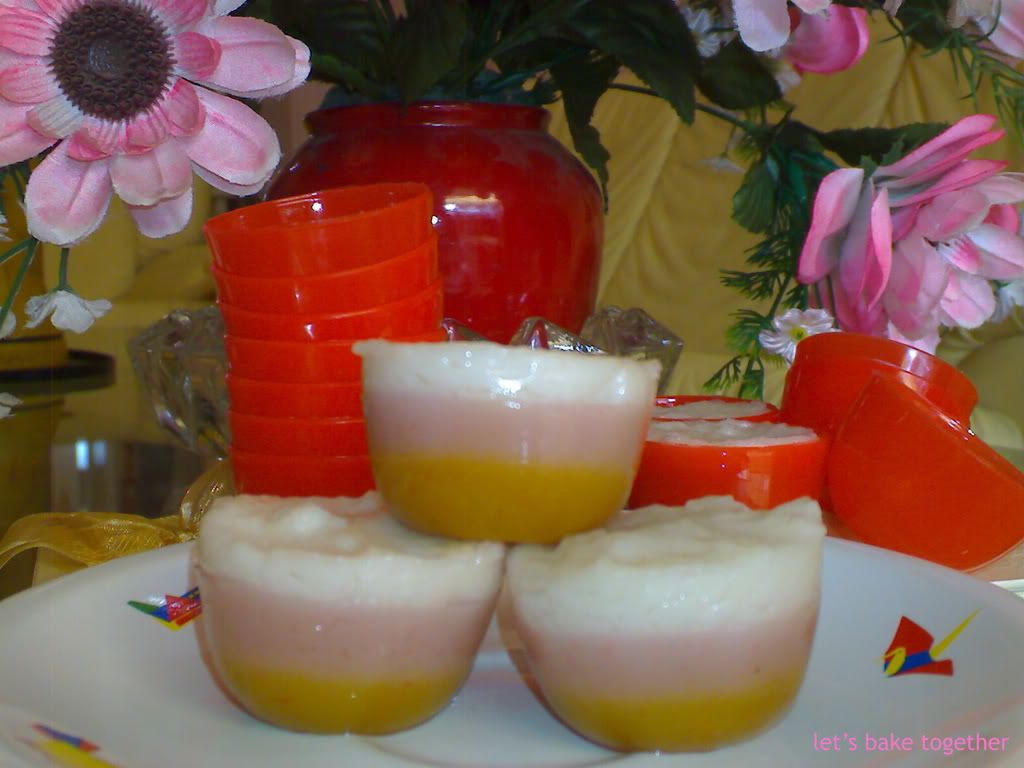
I've been wanting to make this traditional dessert 2 weeks ago, but I was in lazy mood :p and just shoot it out last weekend hehehe..... Why the "Kue Talam" is pink? :p Cuz my maid couldn't found the "Suji" leaf and instead I use few drops of red food colouring hehehe... That's the story of my "Kue Talam Pink".


Unfortunately, I didn't succeed :( hiks hiks hiks... Still haven't figure it out why it turned out a bit hard, it's supposed to be soft close to a pudding, especially the pink layer (is it b'cuz of the pink drops? :( maybe someone can tell me what did I do wrong ...helppp... hiks hiks hiks). But... I'll try this traditional dessert again in the future, Jia You...Eppie!! :)

Talam Ketan (Betawi)
Source: Tabloid Nova

Adonan I:
600 ml santan cair
1/2 sdt garam
250 gr gula merah, sisir halus
50 gr gula pasir
2 lbr daun pandan
100 gr tepung beras } campur
50 gr tepung sagu }

Adonan II:
600 ml santan cair
190 gr gula pasir
2 lbr daun pandan
1/2 sdt garam
35 ml air perasan daun pandan dan suji (I put 4 drops of red colour food colouring instead)
190 gr tepung } campur
75 gr tepung sagu }

Adonan III:
60 gr tepung beras }
15 gr tepung sagu } campur
575 ml santan kental
1/2 sdt garam

Cara membuat:
1. Buat adonan I: rebus santan, garam, gula merah, gula pasir, dan daun pandan sampai gula larut lalu saring.
2. Tuang larutan gula ke dalam campuran tepung sedikit demi sedikit sambil terus diaduk sampai rata.
3. Siapkan loyang ukuran 22x22x7 cm (gue pake mangkuk cetakan talam yang kecil2 :p and ternyata makin repotin), olesi minyak dan alasi plastik. Panaskan loyang dalam dandang, lalu tuang adonan. Kukus sampai permukaannya mengeras selama 30 menit.
4. Buat adonan II: rebus santan, gula pasir, daun pandan, garam, dan air perasan daun pandan dan suji sampai mendidih, angkat dan saring.
5. Tuang rebusan santan ke dalam campuran tepung sedikit demi sedikit sambil diaduk sampai rata. Tuang adonan ke loyang berisi adonan I. Kukus sampai adonan mengeras selama 30 menit.
6. Adonan III: larutkan campuran tepung dengan 200 ml santan, sisihkan. Rebus sisa santan dan garam sampai mendidih. Kecilkan api, masukkan larutan tepung sambil terus diaduk sampai adonan mengental dan licin.
7. Tuang adonan ke atas adonan II, kukus sampai matang selama 45 menit.Angkat dan dinginkan.
Untuk 24 potong

Wednesday 18 July 2007

Mini Quiches

Actually I made this last month, requested by a friend of mine and by chance I found this cute Mini Quiches from vania's blog. I must agree with vania, it's absolutely delicious. I couldn't stop myself from snacking on them. Especially when it's just out from the oven...hm... warm, soft and cheesy. So small and so cute.... I couldn't stop to have one .... and one.... and another one while arranging 'em into a container to go. If I wasn't thinking of my weight, I think I probably had them all, enjoy 'em myself with a glass of ice lemon tea, while also enjoying a good movie :p Definitely I'd put this one on my top lists. Highly recommended! I even doubled the recipe and none of 'em left :)


Mini Quiches
Makes 24 cute mini quiches :)

Ingredients:
1/2 cup milk
1/2 cup heavy cream
2 large eggs
1 large egg yolk
Pinch of freshly grated nutmeg
Coarse salt and freshly ground pepper
All-purpose flour, for work surface
1/2 recipe Pâte Brisée
3 ounces finely shredded Mozzarella & Cheddar cheese
2 ounces cooked smoke beef, cut into 1/4-inch pieces
1 ounce cooked button mushooms, cut into small pieces
1. Preheat oven to 375°. Heat oil in a nonstick skillet over medium heat. Add smoke beef and cook about 2 minutes, transfer to paper towel to drain. Add mushrooms to the same skillet, reduce heat to medium low, and cook about 2 minutes. Set aside.

2. In a medium bowl, whisk together milk, heavy cream, eggs, yolk, and nutmeg. Season with salt and pepper. Strain through a sieve into a medium bowl; set aside.

3. On a lightly floured surface, roll out pâte brisée to slightly less than 1/8 inch thick. Use a 2 3/4-inch round cutter to cut out 24 rounds. Fit rounds into a 24-cup nonstick mini muffin tin. If the pâte brisée becomes too soft to work with, place in refrigerator to chill for 15 minutes. Divide half of cheese evenly between the lined cups. Top with mushrooms and smoke beef. Divide milk mixture evenly between cups. Top each with smoke beef. Sprinkle with remaining cheese.

4. Bake until puffed and golden brown, about 30 minutes. Remove from oven; immediately remove quiches from muffin tin, and transfer to a wire rack. Serve warm or at room temperature.

Pâte Brisée (Pie Dough)

Makes 1 double-crust or 2 single-crust 9- to 10-inch pies
Pâte brisée is the French version of classic pie or tart pastry. Pressing the dough into a disk rather than shaping it into a ball allows it to chill faster. This will also make the dough easier to roll out, and if you freeze it, it will thaw more quickly.
2 1/2 cups all-purpose flour
1 teaspoon salt
1 teaspoon sugar
1 cup (2 sticks) unsalted butter, chilled and cut into small pieces
1/4 to 1/2 cup ice water

1. In the bowl of a food processor, combine flour, salt, and sugar. Add butter, and process until the mixture resembles coarse meal, 8 to 10 seconds.

2. With machine running, add ice water in a slow, steady stream through feed tube. Pulse until dough holds together without being wet or sticky; be careful not to process more than 30 seconds. To test, squeeze a small amount together: If it is crumbly, add more ice water, 1 tablespoon at a time.

3. Divide dough into two equal balls. Flatten each ball into a disk, and wrap in plastic. Transfer to the refrigerator, and chill at least 1 hour. Dough may be stored, frozen, up to 1 month.

Note:

As what I did with the Pizza Tartlet before, same method by using hand, chilled bowl hehehe... I don't have the machine. Manual worked out just fine :p Just try to keep them not getting warmer while doing it and be quick cuz our body have warmer temperature than using a machine.

Tuesday 17 July 2007

Choux Pastry / Kue Soes

No reason not to try this recipe. From the first time looking at the tempting custard filling, I decided right away to try. After all, we always like "Kue Soes" :) But for me, the one bought by my bf's sister from Singapore is still the best ever. I wish the man is kindly enough to share the recipe and tricks with me :p hehehe...

This recipe is from Pennylane's blog. Honestly, it's worth to try. The custard is nearly taste the same as the one bought from Singapore.


Ingredients:
130 g "Cakra Kembar" flour
1 tsp Salt
100 g Margarine
4 Eggs
250 ml Water

Custard Filling:
800 cc Milk
100 g Caster sugar *
5 Egg yolks
50 g Corn starch flour
100 cc Whipped cream
1 tbsp Unsalted butter
5 tbsp Rhum / Brandy (optional) **

Soes:
1. Heat water, salt and margarine until boiling.
2. Add in flour, stir well. Let the dough warm.

3. Heat oven to 200 C.

4. Add in eggs to the dough one at a time while continue mixing (with spatula or mixer) until well mixed.

5. Spuit or spoon on to baking sheet layered with baking paper until the dough finish (you can make any sizes you want to :p, I made small ones, no mess just throw into your mouth). Bake for more or less 25 minutes. Do not open the oven while it's baking and if it's already 25 minutes and still have small bubbles on the Soes, let it stay for few minutes in the oven.

6. Directly cool on a wire rack to avoid the bottom Soes becoming lumpy.

Custard Filling:
1. Stir well corn starch flour with some of the milk. Put aside.

2. Mix egg yolk using a fork, and add in a little bit of milk. Put aside.

3. Heat the remaining milk and sugar, add in the corn starch mixture. Stir well and low the heat down.

4. Take few spoons of the milk, sugar and corn starch mixture and stir well in the egg mixture. This method is to get the egg mixture to nearly same temperature before pouring them together to get soft mixture.

5. Add in whipping cream, stir well and boil once more.

6. Lift away from heat and stir in butter. Keep stirring to cool.

Finishing:
Cut small line on the each Soes and fill in the custard using piping bag.

* 100 g is the modified version by Pennylane. But for me and my family, it's not sweet enough since the Soes has no taste. So, I think next time I'll go back to the original version 200 g.
** I don't add any of this cuz I want to keep the milky smell :p

Saturday 14 July 2007

Cheesy Sago

I made this Cheesy Sago on the same day with strawberry birthday cake from the egg yolk left. Cuz the strawberry cake only uses white eggs. In fact, I already planned it before after checking out Stella's blog (cikciks). Everyone there were saying that the recipe is kicking :)


With my sister's help, I made some small changes to the recipe. Not because I was trying to be an expert but..... I was ran out of the ingredient hehehe...... We baked together, it wasn't the first time though :) She also likes to bake and sometime once a while she takes orders from her friends. They like her "kue lapis" very much :p
Not easy to pipe using spuit for this cheesy Sago. And I wasn't in the mood after what I had been through with the strawberry cake :( Lucky my sister was there and she kinly piped one by one onto the baking sheet. Meanwhile, I decided to change the shape hahaha.... easy and quick :p


Cheesy Sago

Ingredients:
225 g Unsalted butter
125 g Powdered sugar
2 Egg yolks, steamed and mashed
25 gr fresh cream
150 g Grated parmesan cheese *
300 g Sago flour
50 g Corn starch flour
50 g All purpose flour
2 Pandan leaves


1. Stir well sago flour and pandan leaves using heat until dried.

2. Mix butter and sugar until soft.

3. Add eggs, one at a time and mixed well in each addition.

4. Add in grated parmesan cheese and mashed egg yolk, stir well using wooden spoon.

5. Add in sago flour, corn starch and all purpose flour. Stir well.

6. Using piping bag, pump out small star shapes on greased baking sheet.

7. Bake in 150 C. Cool and store in air tight container.


* I use half grated parmesan and half grated chedar cheese.

Happy Birthday, Babe

I've been searching the perfect birthday cake for someone who loves strawberry...and I've found one in dianasdesserts website, the "Strawberry Birthday Cake". The photo was very tempting and I decided to make one for my bf's 30th birthday. I was so excited since this is my first time to make a birthday cake. I prepared all the ingredients from a week before except the strawberry, we need a fresh one for the cake...right?? This cake uses lots of strawberries. Believe me....cuz I bought 1.5 kg and only few left in my fridge now :p (I had them the next morning with plain yoghurt for my breakfast......hm..yummy and not to mention it's healthy) This is also my first time to whip cream. My oh my..... I ruinned 'em about 3 times. They were over whipped and became like milk and butter :( It was supposed to use like 1 liter plus and in my case, I have used around 2 liters, my cake still stood on my table with terrible whipping cream on here and there. Arghh.... it was already 2 o'clock in the morning. And no way, I must left it unfinished in the fridge :( I ran to supermarket the next morning, back home to continue and again they were overwhipped. Finally, i asked my bf to get some on the way to my home hehehe....

I didn't want to tuck 'em in the bin, instead I put it in my fridge, wrapped, and maybe I can be able to use 'em. Lucky I didn't throw them out, cuz my mom made custard filling for choux pastry hahaha.....good job, mom.

Finally my cake's ready for the mid-nite show :p, put some candles on and let him make a wish at exactly 12am, July 15th. After all, I was not bad for a first timer :) even it's a mess inside :p


Strawberry Birthday Cake


Ingredients:
2 cups All purpose flour
1 3/4 cups Sugar
1 tbsp Baking powder
1 tsp Salt
3/4 cup (1 1/2 sticks) Unsalted butter, room temperature
6 Large egg whites, beaten to blend
1 cup Whole milk
1 tsp Vanilla extract
1/2 tsp Almond extract (* I don't use, afraid of he doesn't like it)

For Filling and Decorating:
4 1/2 cups Chilled whipping cream
1 cup Strawberry preserves
2 pounds Strawberries, hulled, sliced
1 pound Strawberry, hulled
1 1/2 pounds Marzipan (optional) ** I don't use either

1. Preheat oven to 350 F. Butter two 9-inch round cake pans. Line with parchment paper; butter paper. Dust pans with flour.

2. Combine first 4 ingredients in bowl of electric stand mixer. Add butter and mix with whisk attachment until mixture resembles moist crumbs.

3. Add milk, egg whites and extracts. Mix until smooth, about 2 minutes. Pour batter into prepared pans, dividing evenly. Bake until tester inserted into center of cakes comes out clean, about 25 minutes.

4. Cool 10 minutes. Turn cakes out onto racks and cool completely.

TIPS: Can be prepared 1 day ahead. Wrap weel with plastic and store at room temperature.

Filling:

5. Using long serrated knife, cut each cake layer evenly into 2 layers. Using electric mixer, beat 2 1/2 cups cream in large bowl until firm peaks form.

6. Place 1 cake layer on platter or cake plate. Spread cake with 1/3 cup strawberry preserves. Arrange strawberry slices evenly over preserves. Spread enough cream over strawberries to cover (about 3/4 cup). Repeat layering cake, preserves, strawberries and cream two times, top with remaining cake layer. Spread remaining whipped cream over top and sides of cake.

Decorating:

7. Using electric mixer, beat remaining 2 cups cream in large bowl until firm peaks form. Place whole strawberries over top of cake, points up, leaving 1 1/2 inch border. Using pastry bag fitted with large star tip, pipe cream up sides of cake in vertical lines. Frost top border of cake with remaining whipped cream. Refrigerate until whipped cream is set, about 2 hours. (*Can be made up to 6 hours ahead)

Monday 9 July 2007

Chocolate Cupcake

Thank God it's Friday.

"What's the menu tomorrow? " I think this question will always automatically comes into my head every Friday night...hehehe... It's starting to become one of my habits (beside nail biting :p) On Friday nite, just backed from my bf's place...in my room, getting ready to bed (you know....girl's stuff, washed off the cosmetic, brushed teeth and so on), on the phone with bf for like a minute saying good nite, turned of the light! .......... Then that was the part when the question poped-up. Again, turned on the light, grabbed my recipe collection books while picturing what ingredients left in my mind.
Finally
, I decided to make chocolate cupcake. Easy and delicious :) I ran out of some of the ingredients and substituted with everything that I have and hopping it will turn out okay. Cuz last time when i decided to fill strawberry jam into my strawberry cupcake (which was not in the original recipe) and it turned out bad :( Anyway..... this time I succeeded .... hoorrayyyyy......


Chocolate Cupcake


(Original from "sahabatnestle" Smarties Cake, I made twice the recipe and it yields about 60 cupcakes with small size muffin pans)


Chocolate cupcake:
125 g Unsalted butter
220 g Caster sugar
1 tsp Vanilla extract
3 Eggs
3 tbsp "Nestle Dancow Chocolate flavour" (dissolved in 100 ml of water)*
1 pkg Smarties**


Sifted together:
210 g All purpose flour
15 g Chocolate powder
1 tsp Baking powder
1/2 tsp Salt


Frosting:
250 g Milk cooking chocolate, cut into small cubes***
100 g Cream


Directions:
1. Prepare the muffin pans and line with baking cup paper. Set aside.
2. Mix butter, sugar and vanilla until soft.
3. Add in the eggs, one at a time and mixing until soft.
4. Pour in 1/3 of milk and 1/3 of mixed flour. Mix well with rubber spatula in each additions. And do the steps with the remaining milk and mixed flour until finish, and mix well.
5. Scoop into each lined muffin pans.
6. Bake in 180 C for 30 minutes or until a toothpick inserted in the center and comes out clean.
7. Remove from the muffin pans and cool completely on a wire rack.
8. Top with the chocolate frosting.


Frosting:
Melt the chocolate, remove from heat and stir in the cream. Stirring until become silk texture.


* For twice of the recipe, I used 5 tbsp of Dancow Fullcream and 2 tbsp of Unsweetened chocolate powder and 200 ml of room temperature water. Sieve the mixture to get rid of the clump.
** I don't have Smarties in my fridge so I used coloured chocolate chips.
*** I used dark cooking chocolate and cream and it's not enough for making twice of the recipe :p so.... I just used whatever left. 150 g Dark cooking chocolate and around 5 tbsp of cream left :p. But it's enough to frost all 60 cupcakes.

Tuesday 3 July 2007

Egg Tart

Perhaps I'm the only person on earth that not crazy for Egg Tart. But... I like the tart crust though. So..., never had it in my mind to keep the recipe. Until I met with my bf :) , we are like "complement" to each other. I like egg white, he likes the yolk. I like the crust, he likes the egg tart's filling. PERFECT ! :)

So.... after asking me to make egg tart many times (I think too many..... :p), here I am... making it upon his special request..... cuz he is SPECIAL :)

My First Egg Tart, don't remember where I got the recipe from but it turned out yummy...except 1 thing, 1/2 tsp of vanilla essence is too much (next time I'll add less :p) for me. But I guess it comes back to the person's taste. My bf thinks it was okay... (of course.... for him, everything with vanilla flavour is tastier than other flavour hehehe). He said, seriously this is "very yummy". phew..... I'm glad he said that. It made the pain suddenly gone and felt that it was all worth it ( I got a burn on my finger when taking out the egg tarts from oven :( ...) When preparing the baking, I wasn't sure how it will turn out but I baked with my passion for baking and love one. Relying on the saying that if you make something for your love one, automatically you add in "LOVE" in the recipe, and that makes it perfect and you can not find it anywhere else. That is so.....TRUE :) The recipe is already perfect as it is, but it makes even more perfect.


Egg Tart
Makes 12
Tart Crust
150 g All purpose flour
2 tbsp Maizena
1 1/2 tbsp Castor sugar
1/4 tsp salt
1 Egg yolk
100 g Butter

Custart (Filling)
2 Eggs
1 tbsp Condense milk
Pinch of salt
100 ml Evaporated milk
200 ml Water
2 tbsp Sugar
1/2 tsp Vanilla essence

1. Mix all crust ingredients till become a dough.
2. Roll the dough to thin, and press into each tart pans. Set aside.
3. Well mixed the eggs, condense milk and salt.
4. Heat evaporated milk, water and sugar. Let it cool. Then pour in the egg mixture. Add in vanilla essence.
5. Fill the prepared tarts with the egg and milk mixture.
6. Bake in the oven with 180 C for 25 minutes.